Creating a CSV-Based Campaign in Alice
Overview
This guide explains how to set up a new campaign in Alice by importing a list of contacts from a CSV file. You will learn how to access the Campaigns dashboard, start a campaign, select the CSV import workflow, and upload your file so that Alice can map your columns to the correct fields.
Expected outcome: A new campaign is created and your CSV file is uploaded, ready for column-mapping and launch.
Estimated time to complete: 5-10 minutes
Watch the process
Prerequisites
-
Alice account with permission to create campaigns
-
A CSV file that contains, at a minimum:
-
First Name
-
Email or LinkedIn Profile URL
-
-
(Recommended) Additional columns for richer personalisation:
-
Job Title
-
Company
-
Industry
-
Notes or other custom fields
-
Step-by-Step Instructions
-
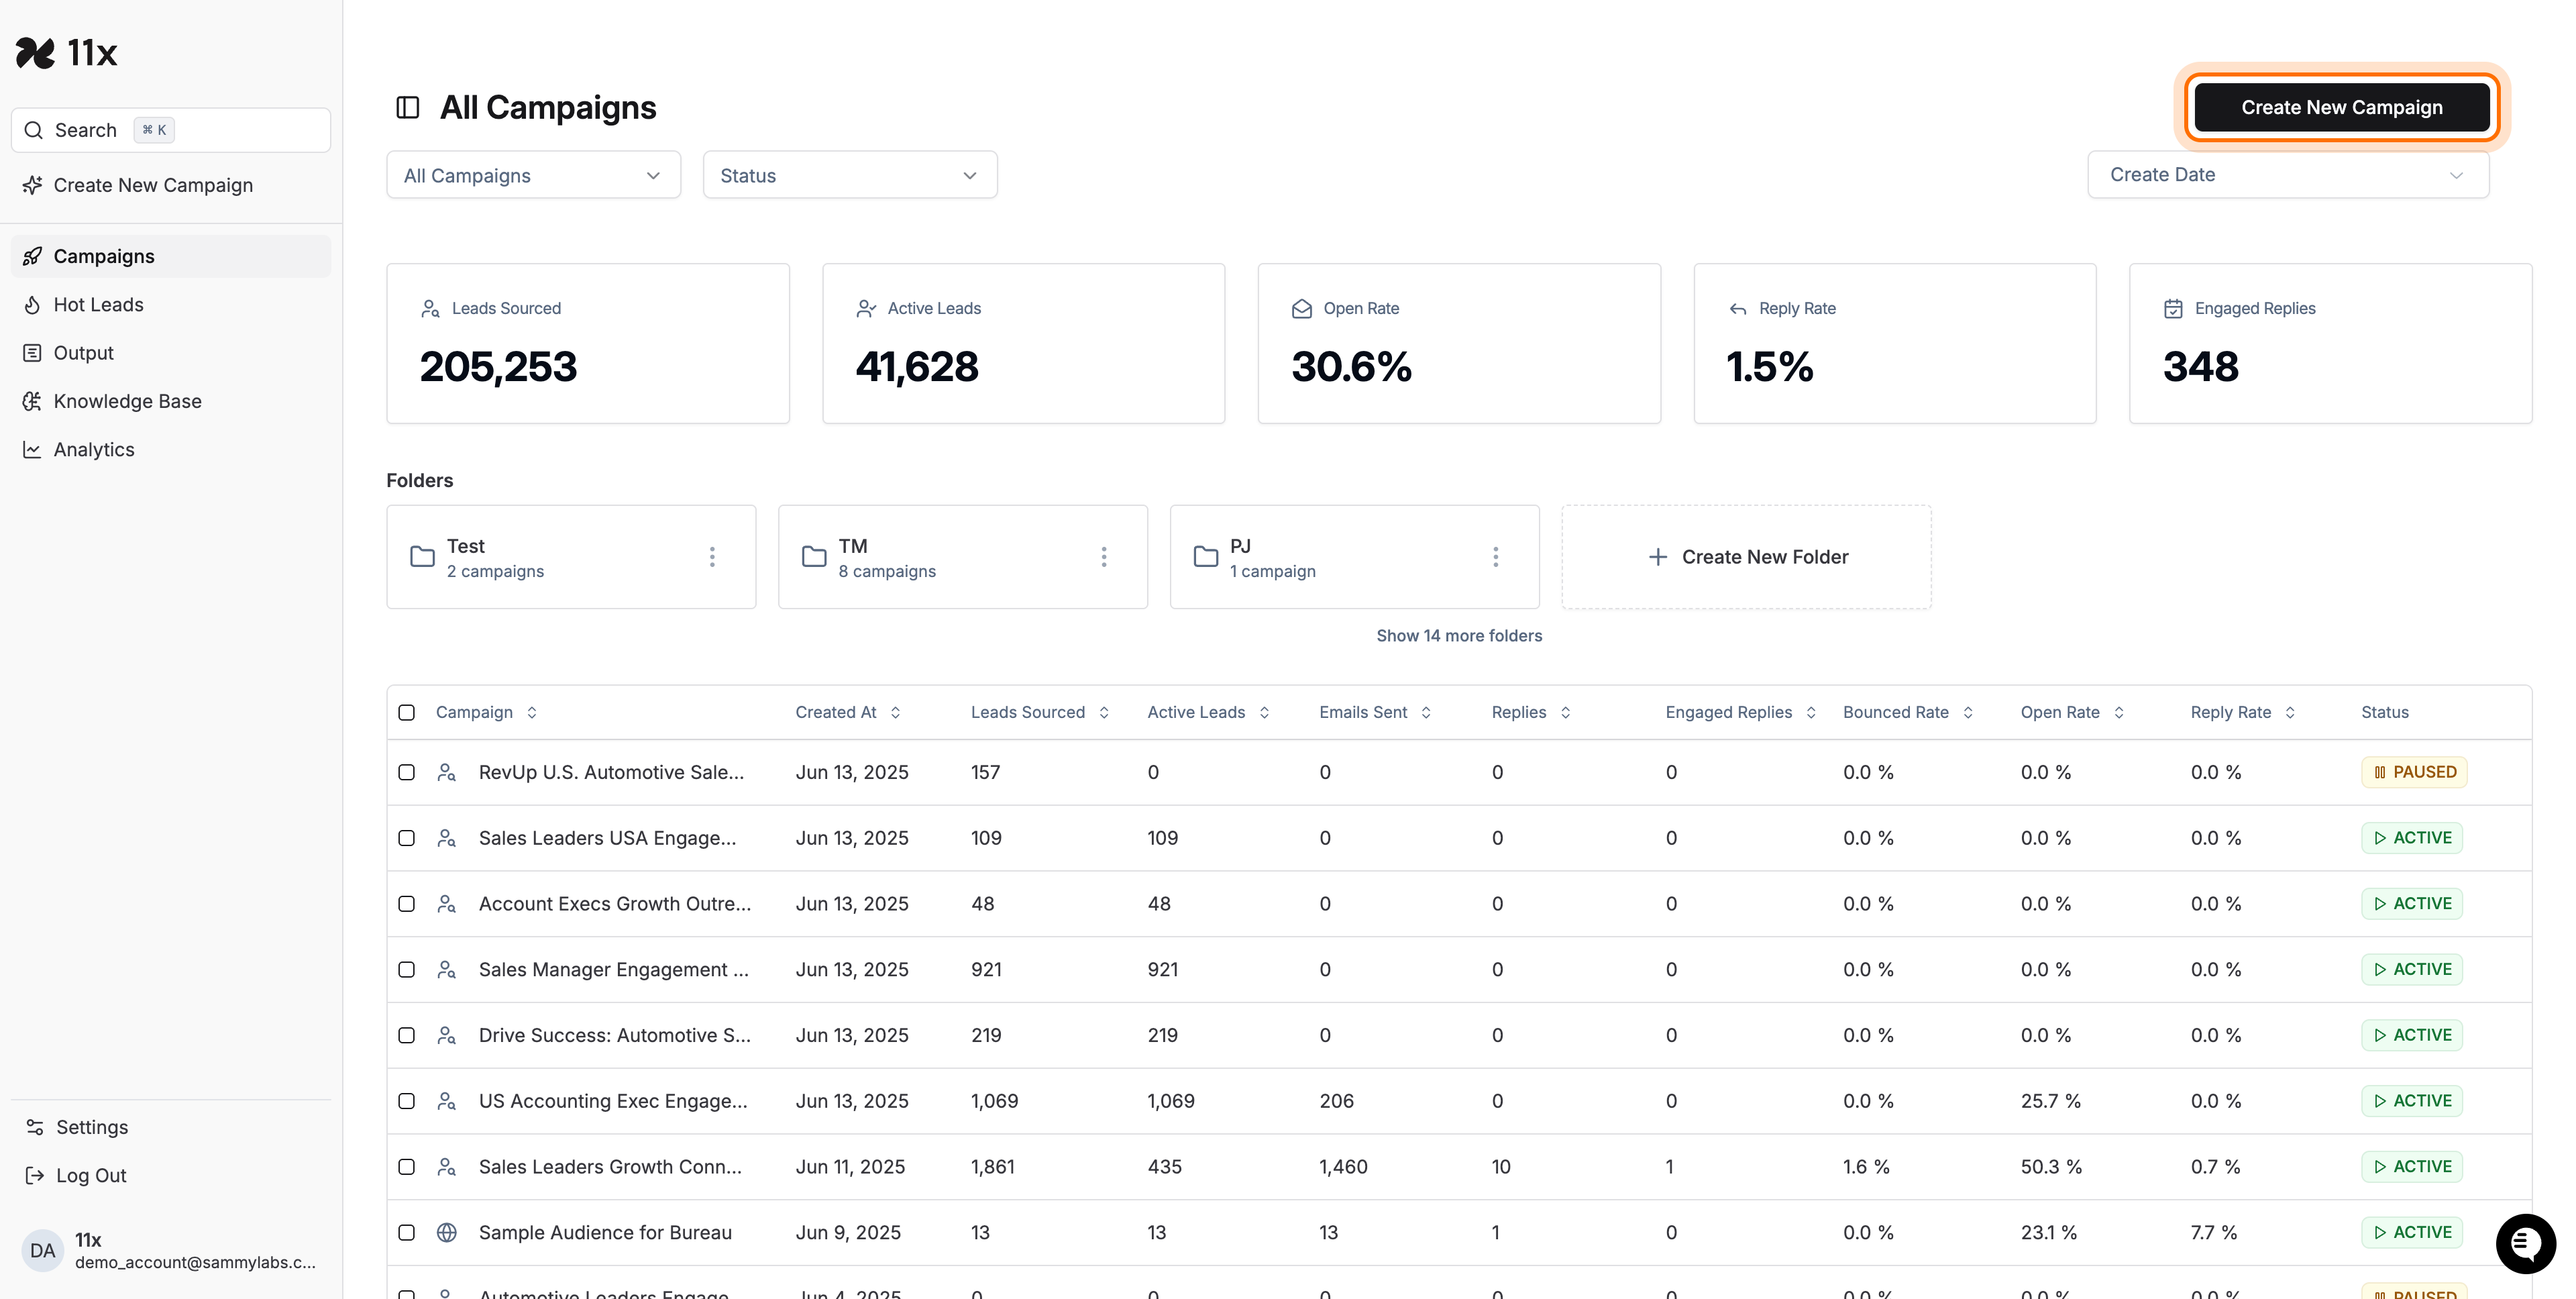
Navigate to the Campaigns Dashboard
-
Log in to Alice.
-
In the left-hand menu, click Campaigns.
-
-
Start a New Campaign
-
Click Create New Campaign in the upper-right corner.
-
The campaign creation interface opens.
-
-
Select the CSV Upload Workflow
- In the audience selection tabs at the top, click Upload CSV to switch to the import workflow.
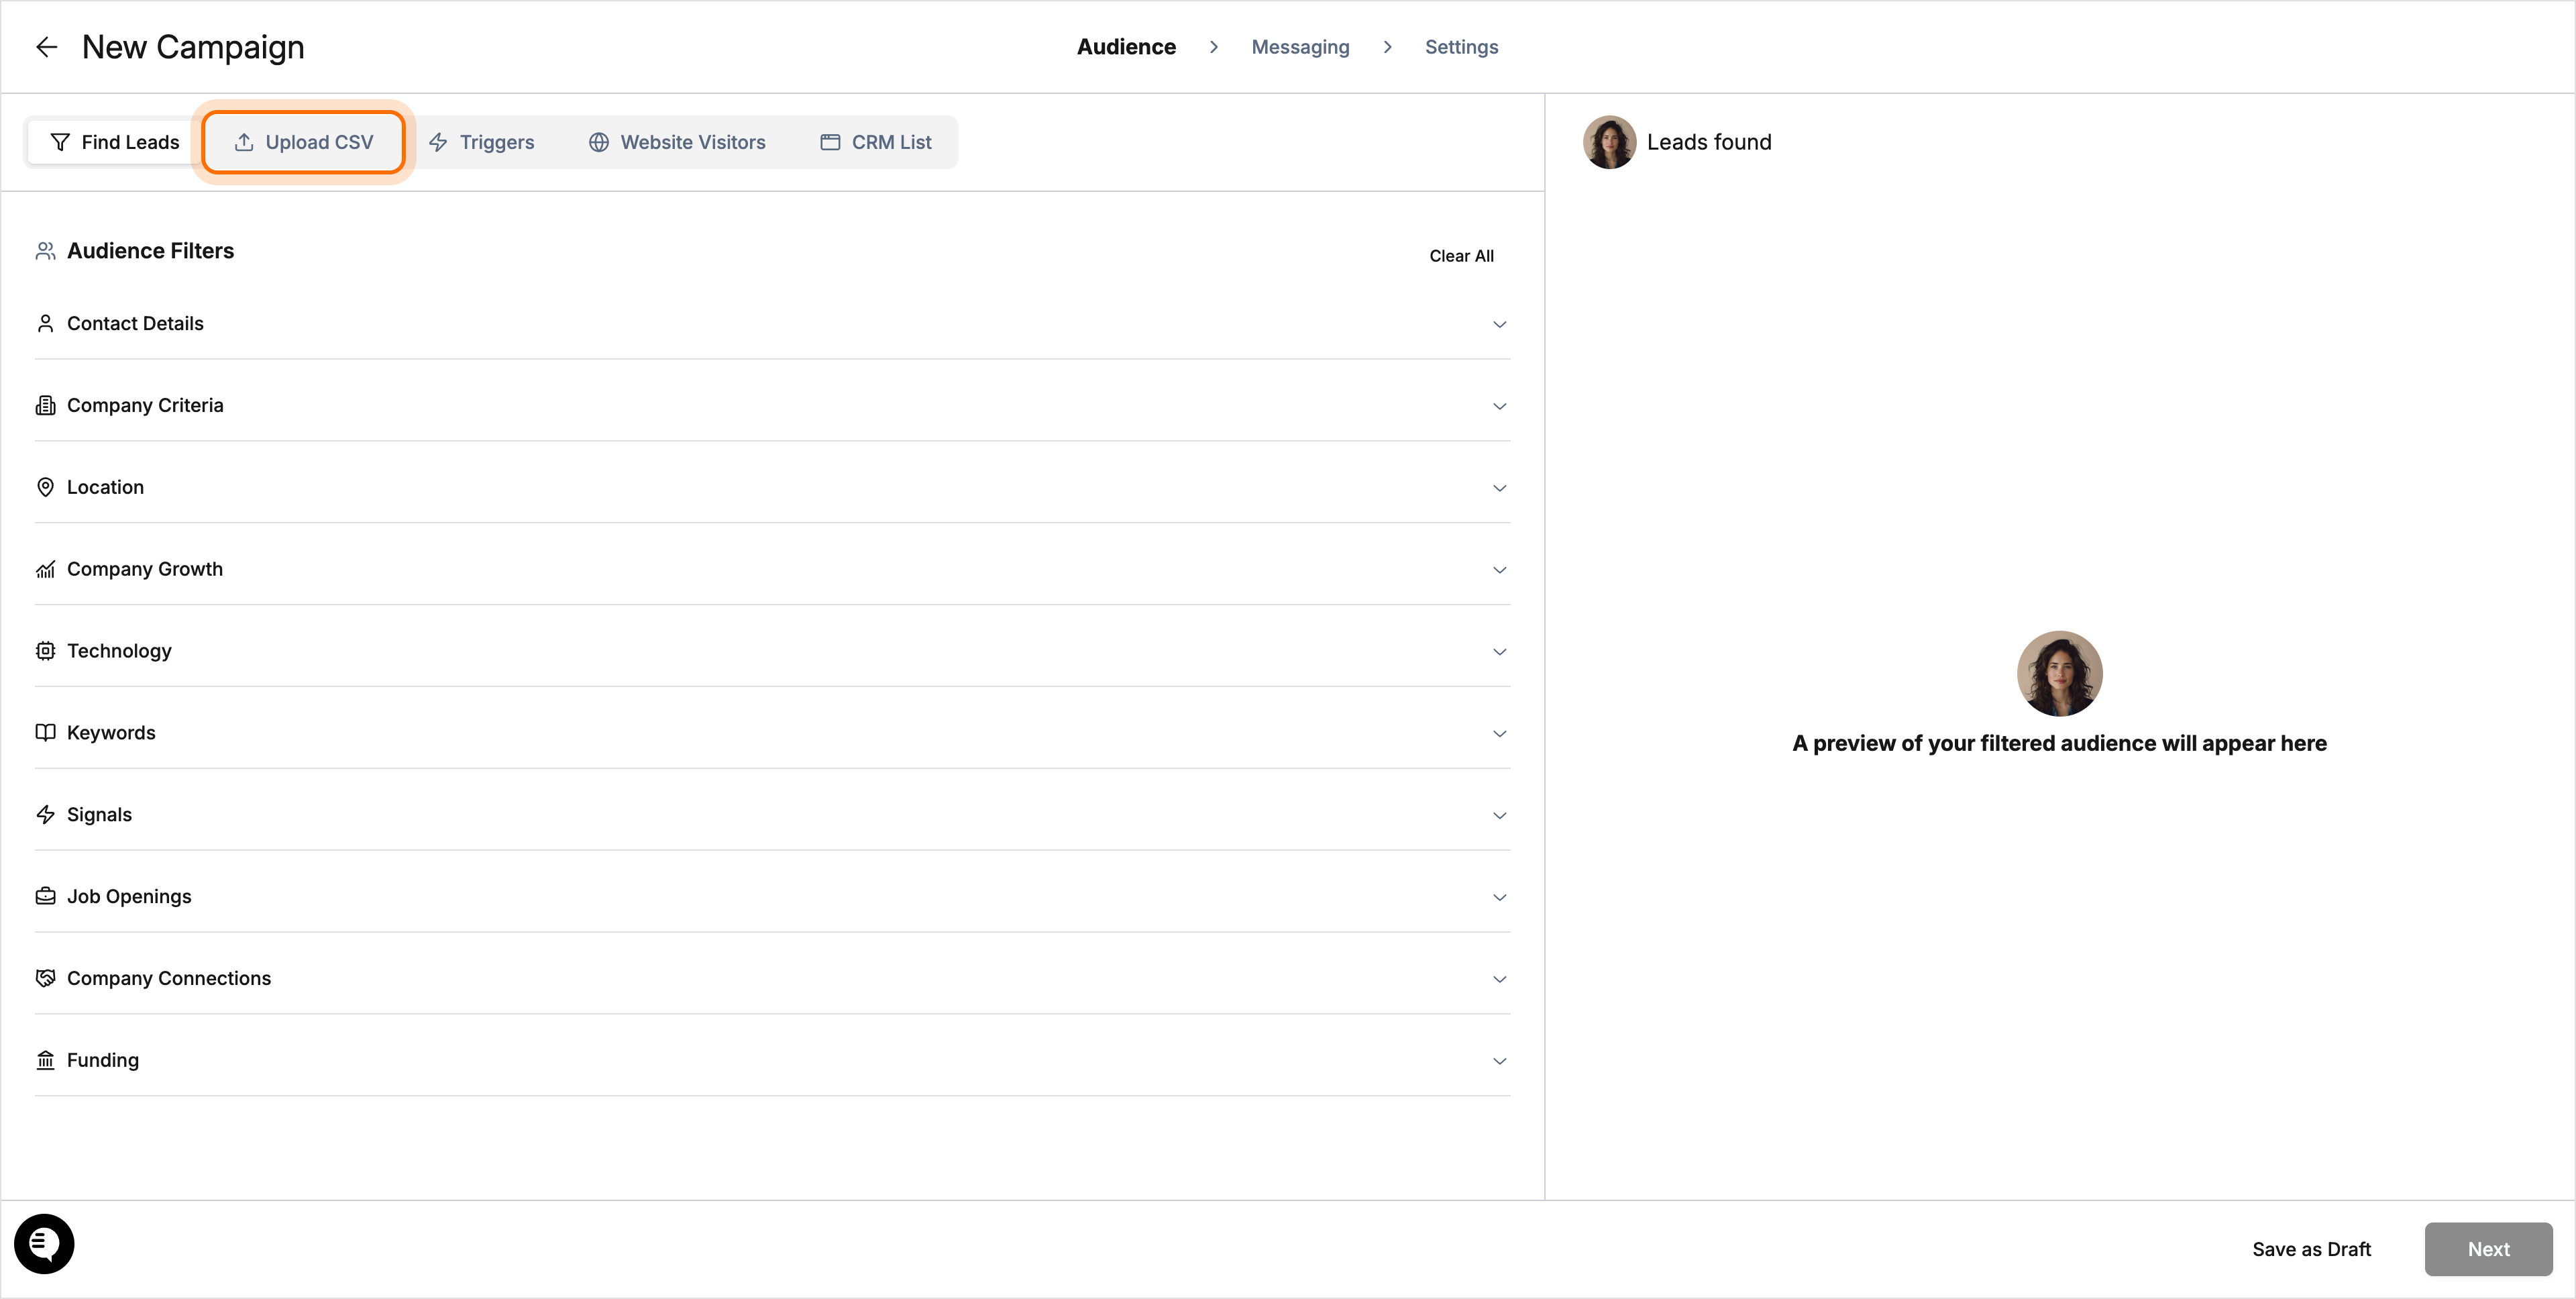
- In the audience selection tabs at the top, click Upload CSV to switch to the import workflow.
-
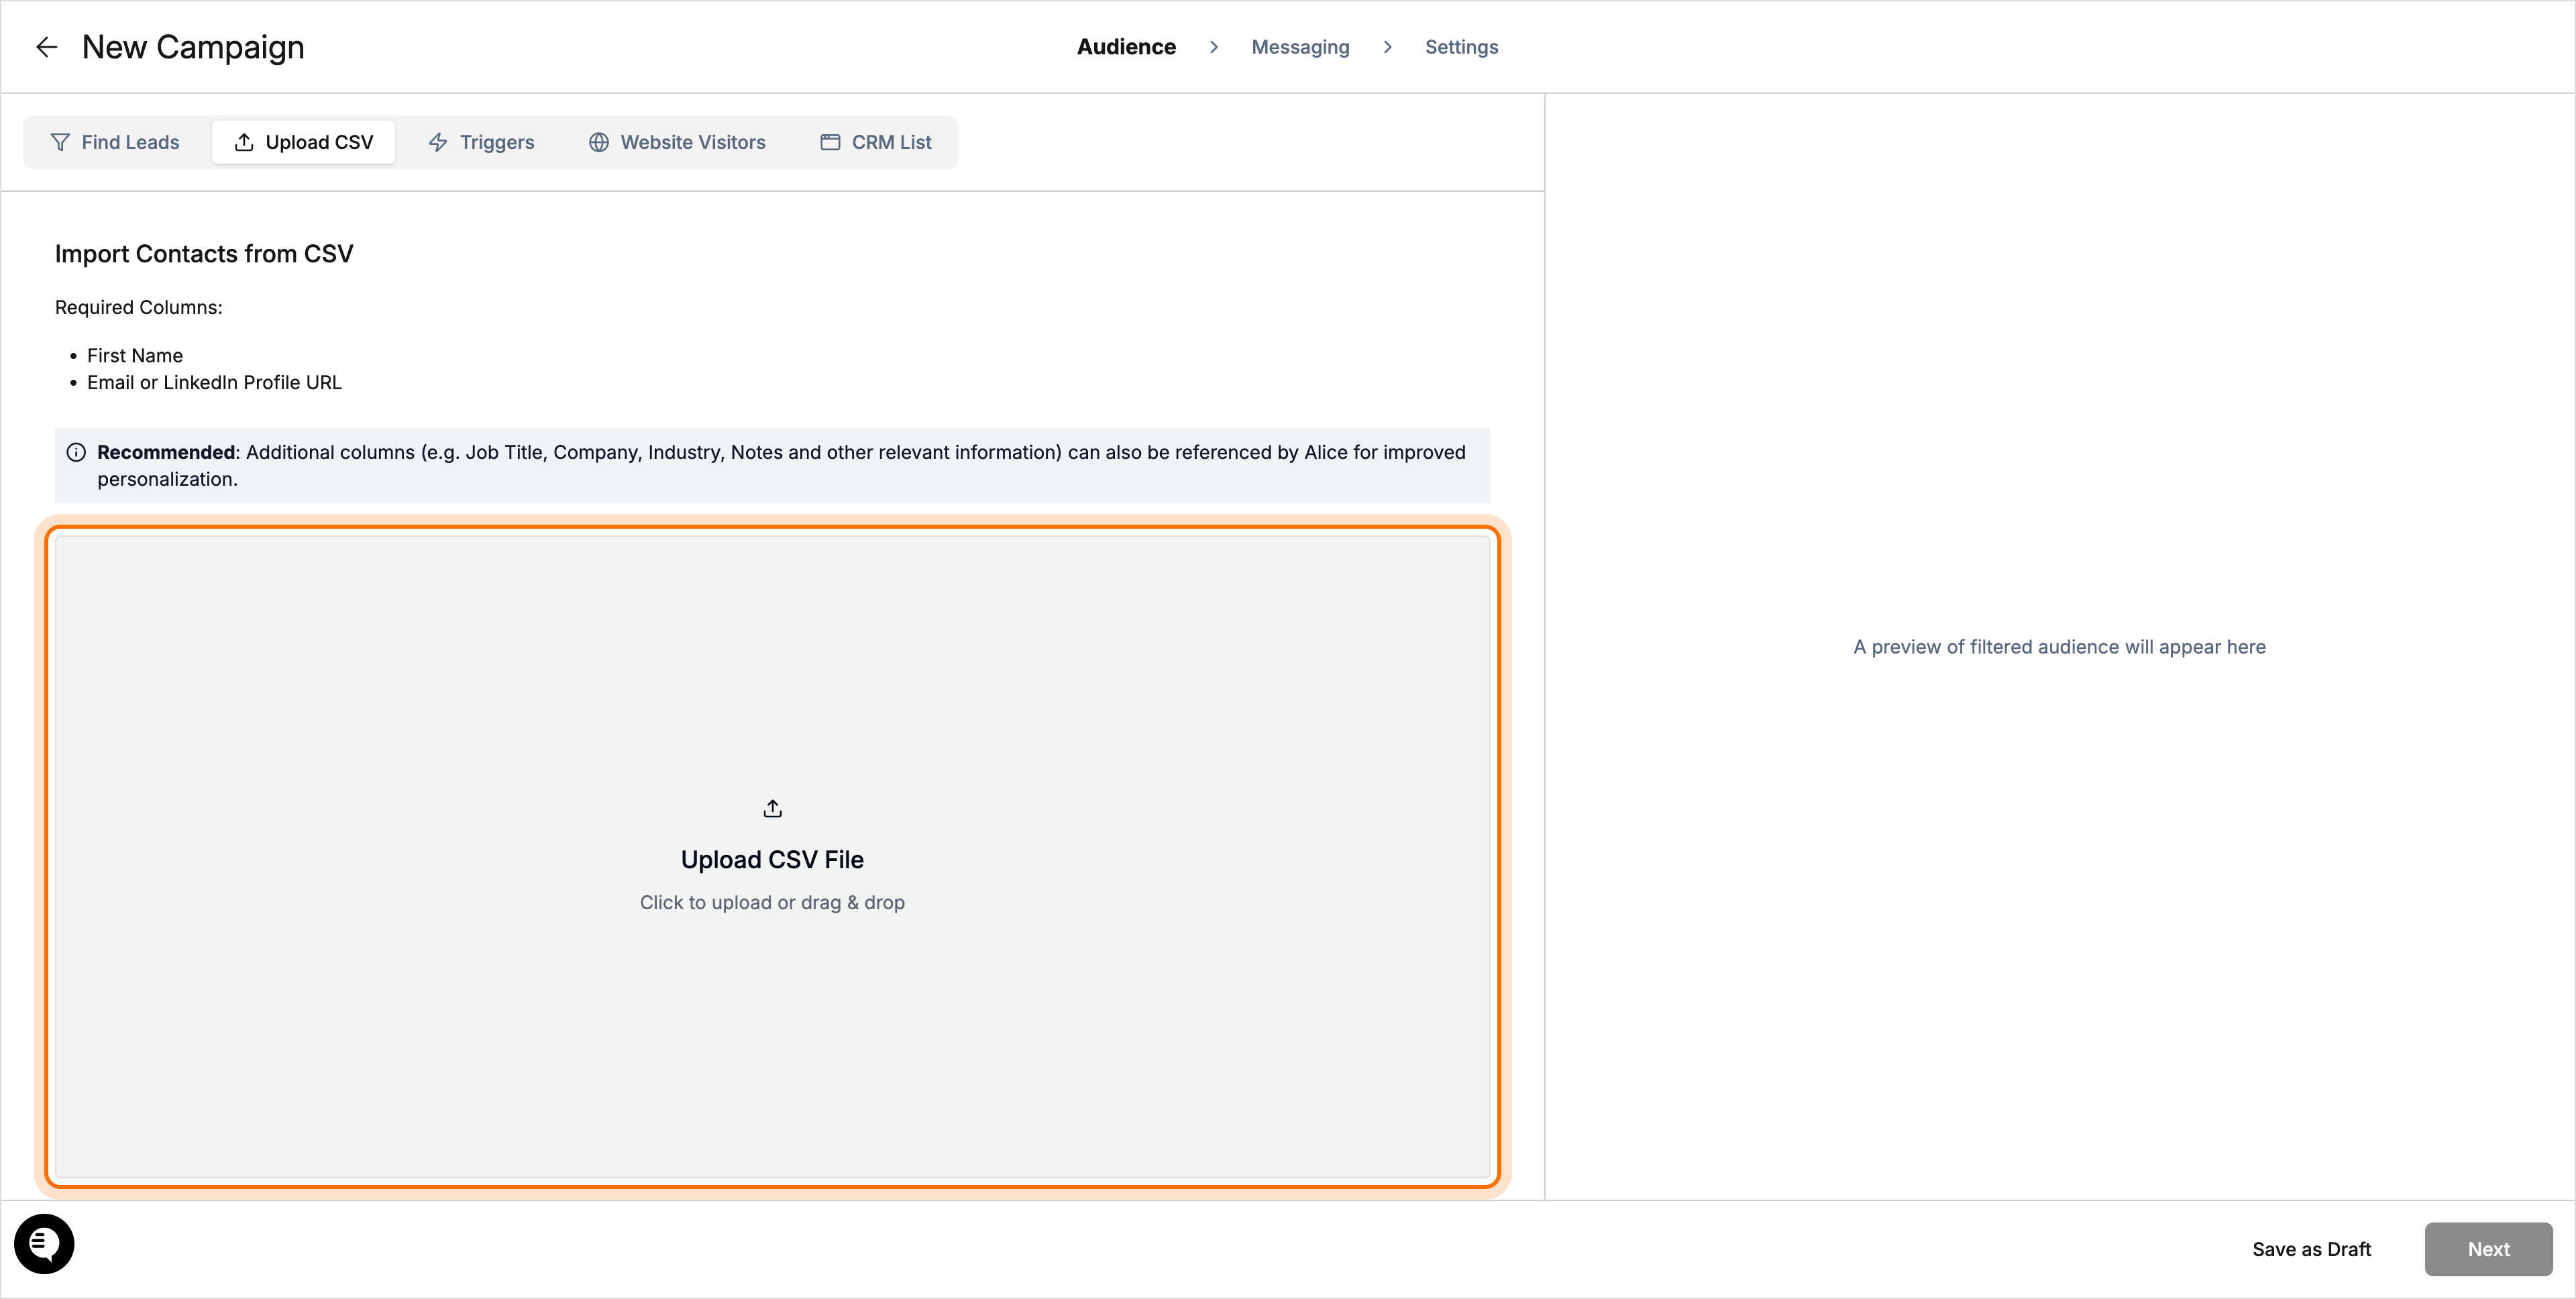
Review Required & Recommended Columns
-
Alice reminds you that First Name and Email or LinkedIn Profile URL are required.
-
Additional columns (Job Title, Company, Industry, Notes) are optional but boost personalisation.
-
-
Upload Your CSV File
-
Click the Upload CSV File area or drag-and-drop your file.
-
A file-picker dialog appears; choose your CSV file.
-
-
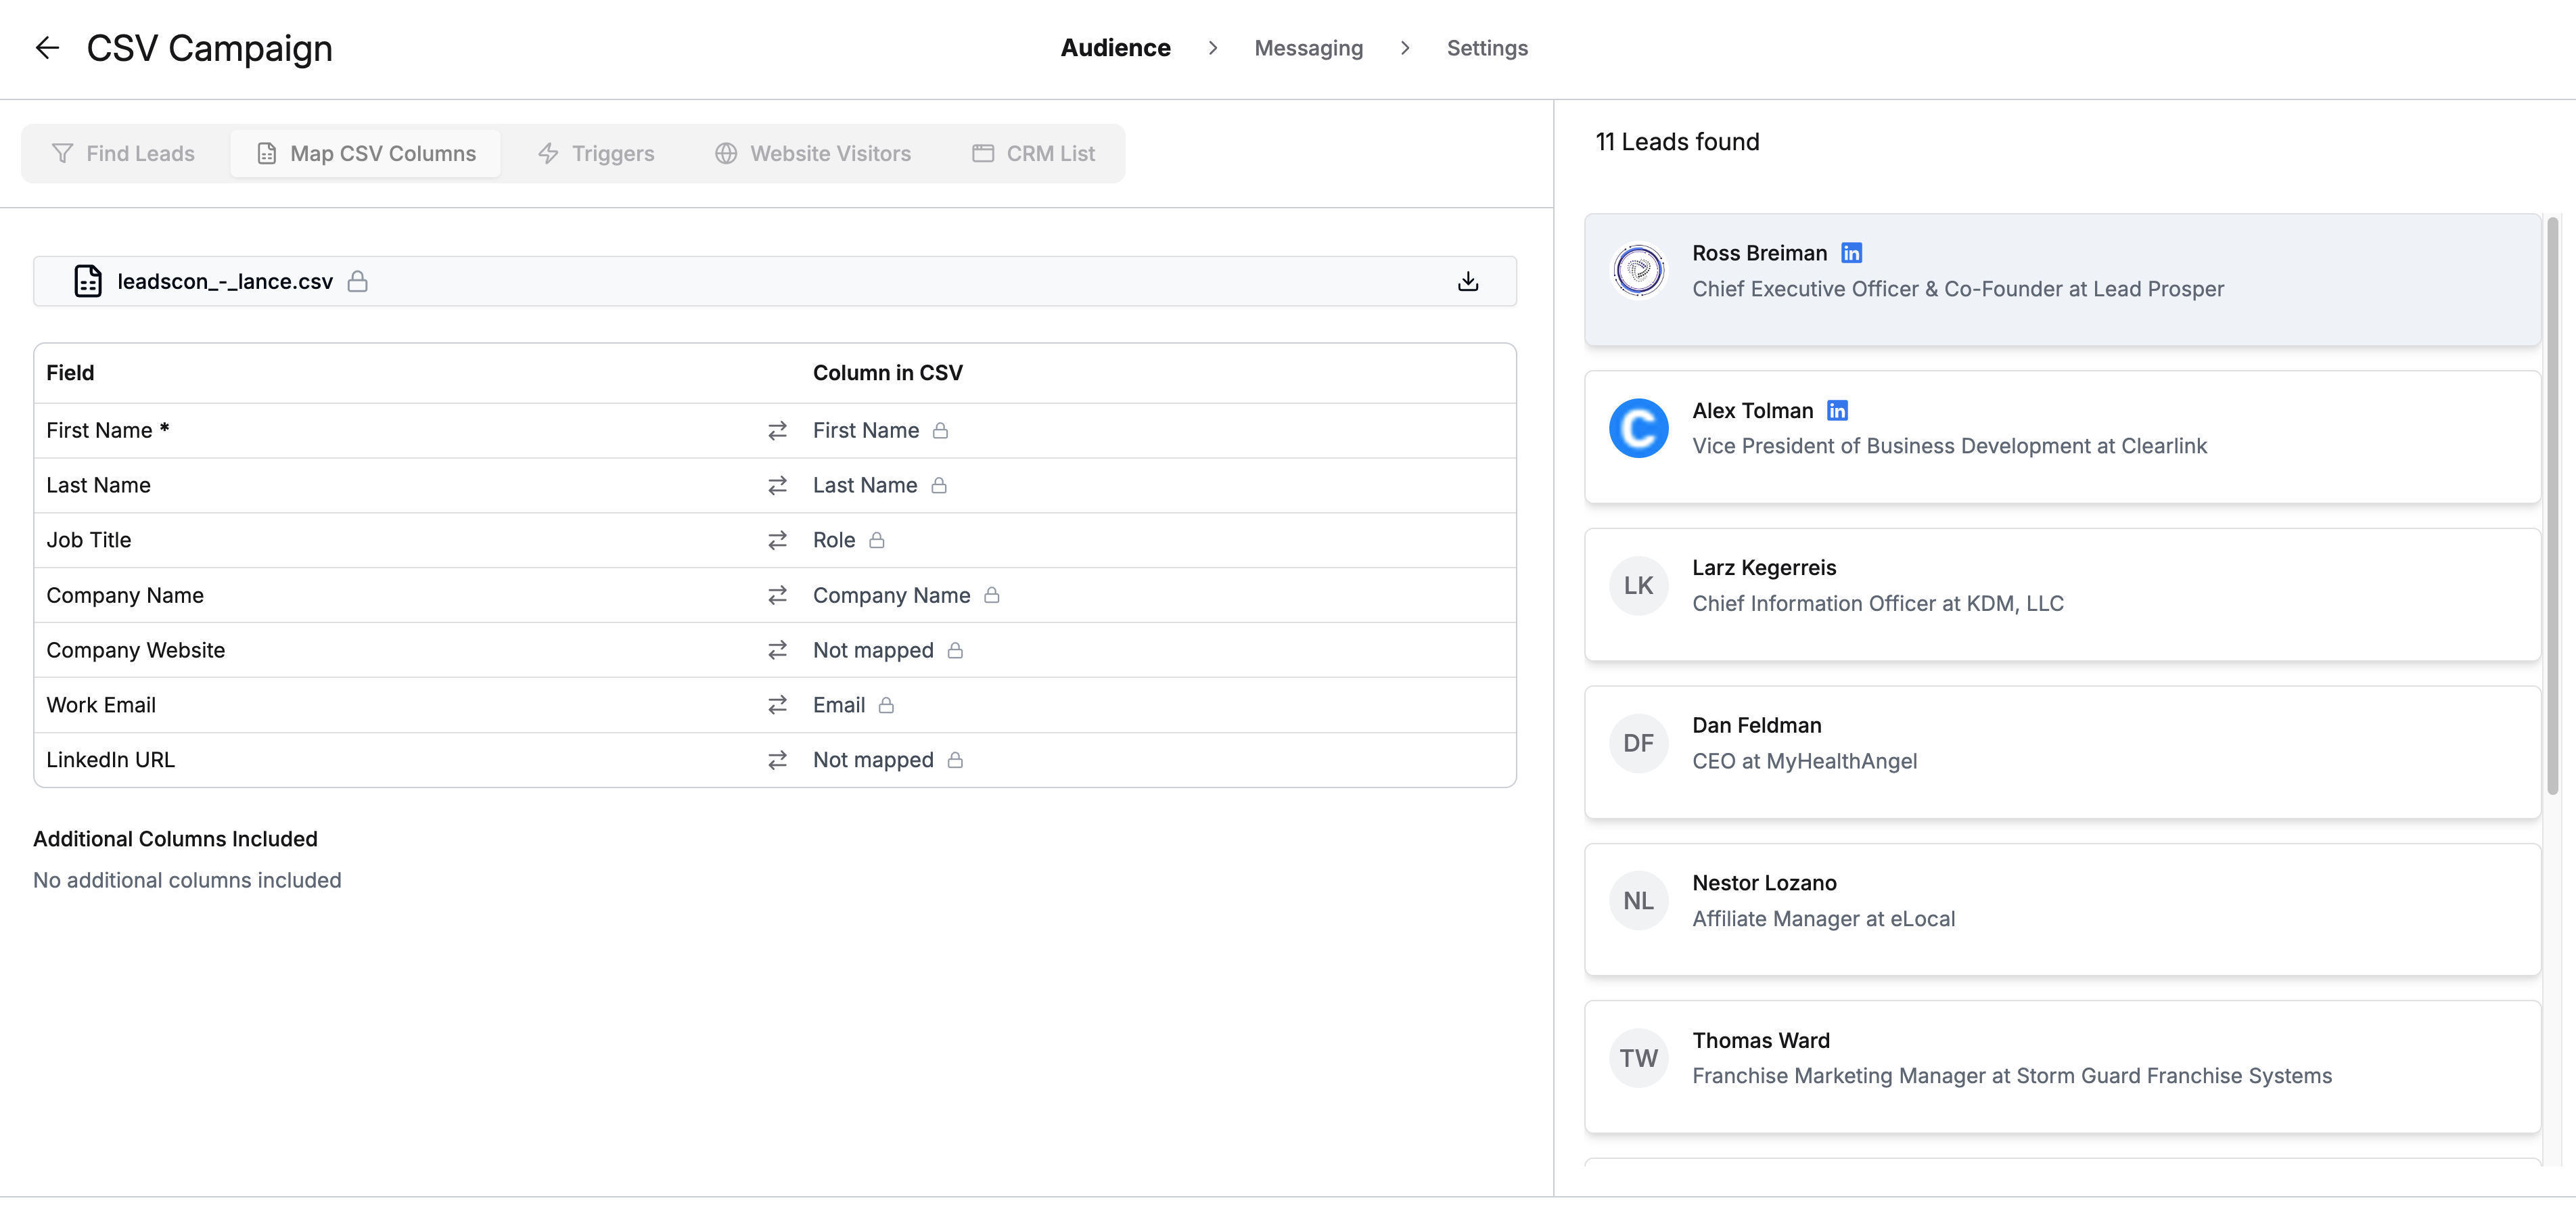
Prepare for Column Mapping
-
After the file is accepted, Alice displays the column-mapping screen.
-
Map each CSV column to the appropriate Alice field and click Next.
-
Verification & Success Criteria
-
The upload area shows your file name without errors.
-
Alice prompts you to map columns after upload.
-
No warnings appear for missing First Name or Email / LinkedIn URL columns.
Tips for Success
-
Include as many recommended columns as possible for richer messaging.
-
Remove special characters from column headers to avoid mapping errors.
-
Large files may take longer—keep the browser tab open until the upload completes.
Troubleshooting
-
Cannot click “Create New Campaign”? You may lack permissions. Contact your Alice admin.
-
Missing required columns: Ensure “First Name” and either “Email” or “LinkedIn Profile URL” are present and spelled correctly.
-
File format issues: Only .csv files are supported. Save or export your spreadsheet as CSV.
-
Upload freezes: Refresh the page and retry. If it persists, test your connection or contact support.
Next Steps
After your CSV is successfully uploaded and mapped:
-
Give your campaign a descriptive name.
-
Configure messaging sequences and personalisation tokens.
-
Review settings, schedule send times, and launch your campaign.