Access and Manage Email Settings
Access and Edit Email Settings
Overview
This guide walks you through every task related to email settings in Alice:
-
Reaching the Settings area
-
Opening the Inbox Management interface
-
Understanding the Inbox Management table and bulk-management controls
-
Associating or editing individual email accounts (including external authentication)
A short demo video is available if you prefer to watch the process first:
Prerequisites
-
An Alice account with permission to view Settings and Inbox Management
-
Permission to manage team inboxes and email associations
-
Any external email account you plan to associate must already exist in the organisation-wide list of available accounts
Step-by-Step Instructions
1. Navigate to Settings
From the Campaigns page, click Settings at the bottom of the left-hand navigation menu.
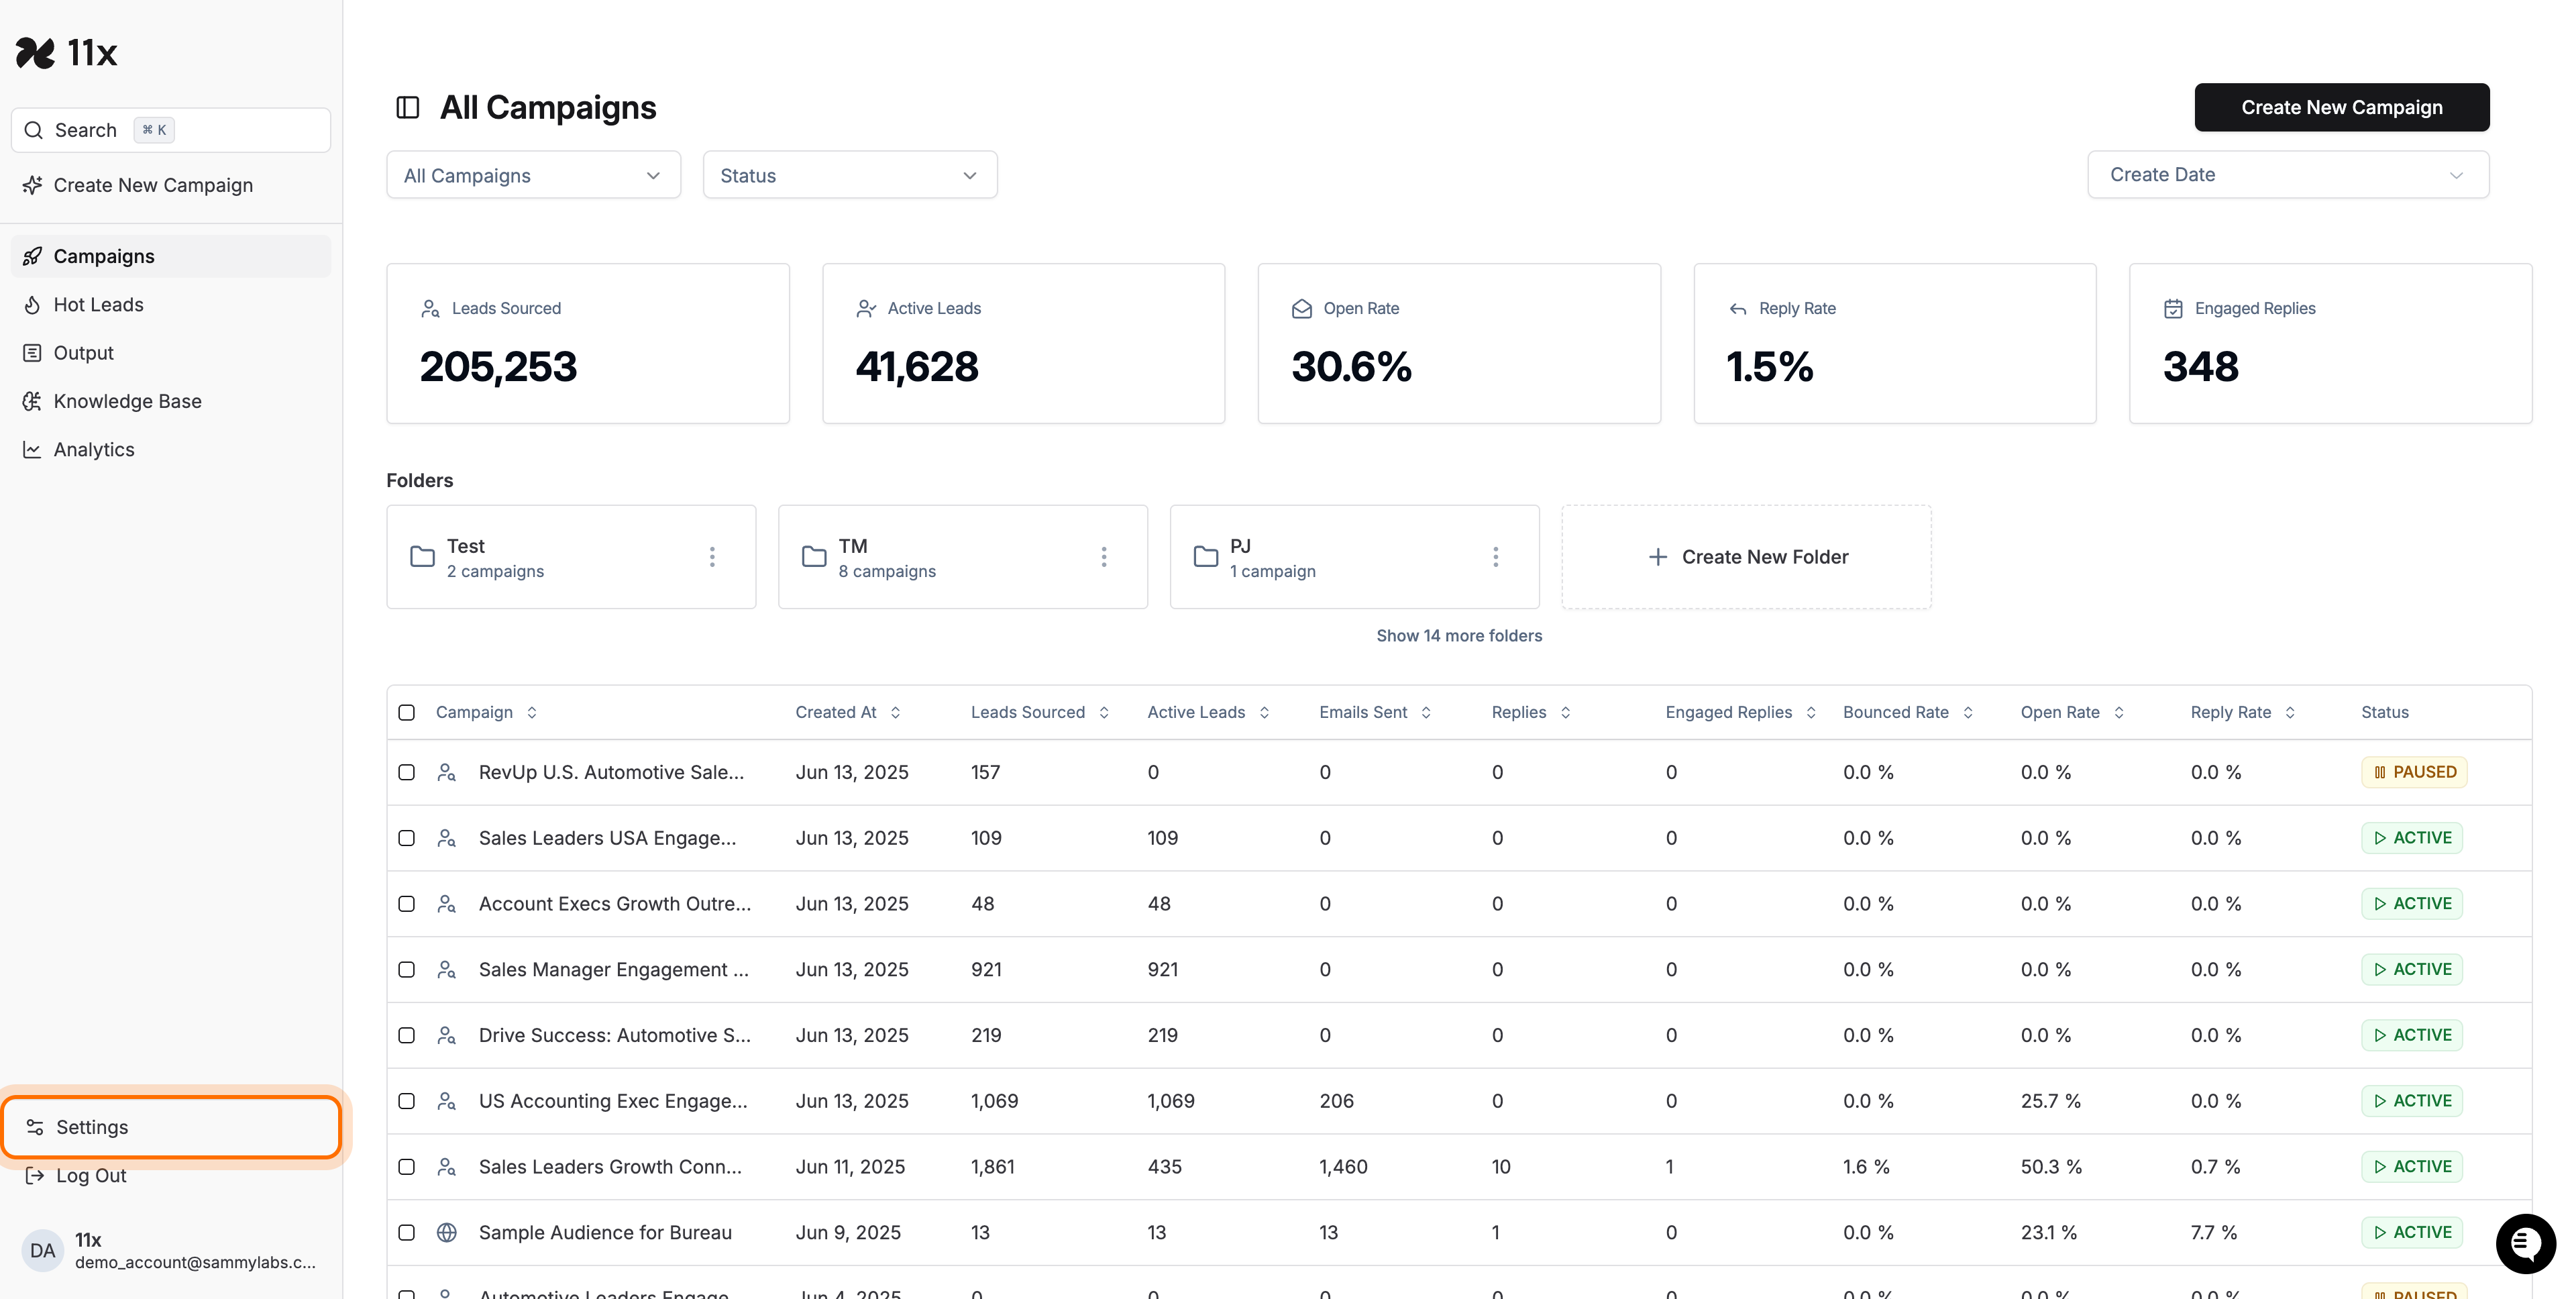
Expected outcome: you land on the main Settings screen with tabs such as Credits, Team, Integrations and Sourcing.
2. Access the Inbox Management Tab
-
In the Settings header, select the Team tab (if it isn’t already selected).
-
Inside Team, click the Inbox Management sub-tab.
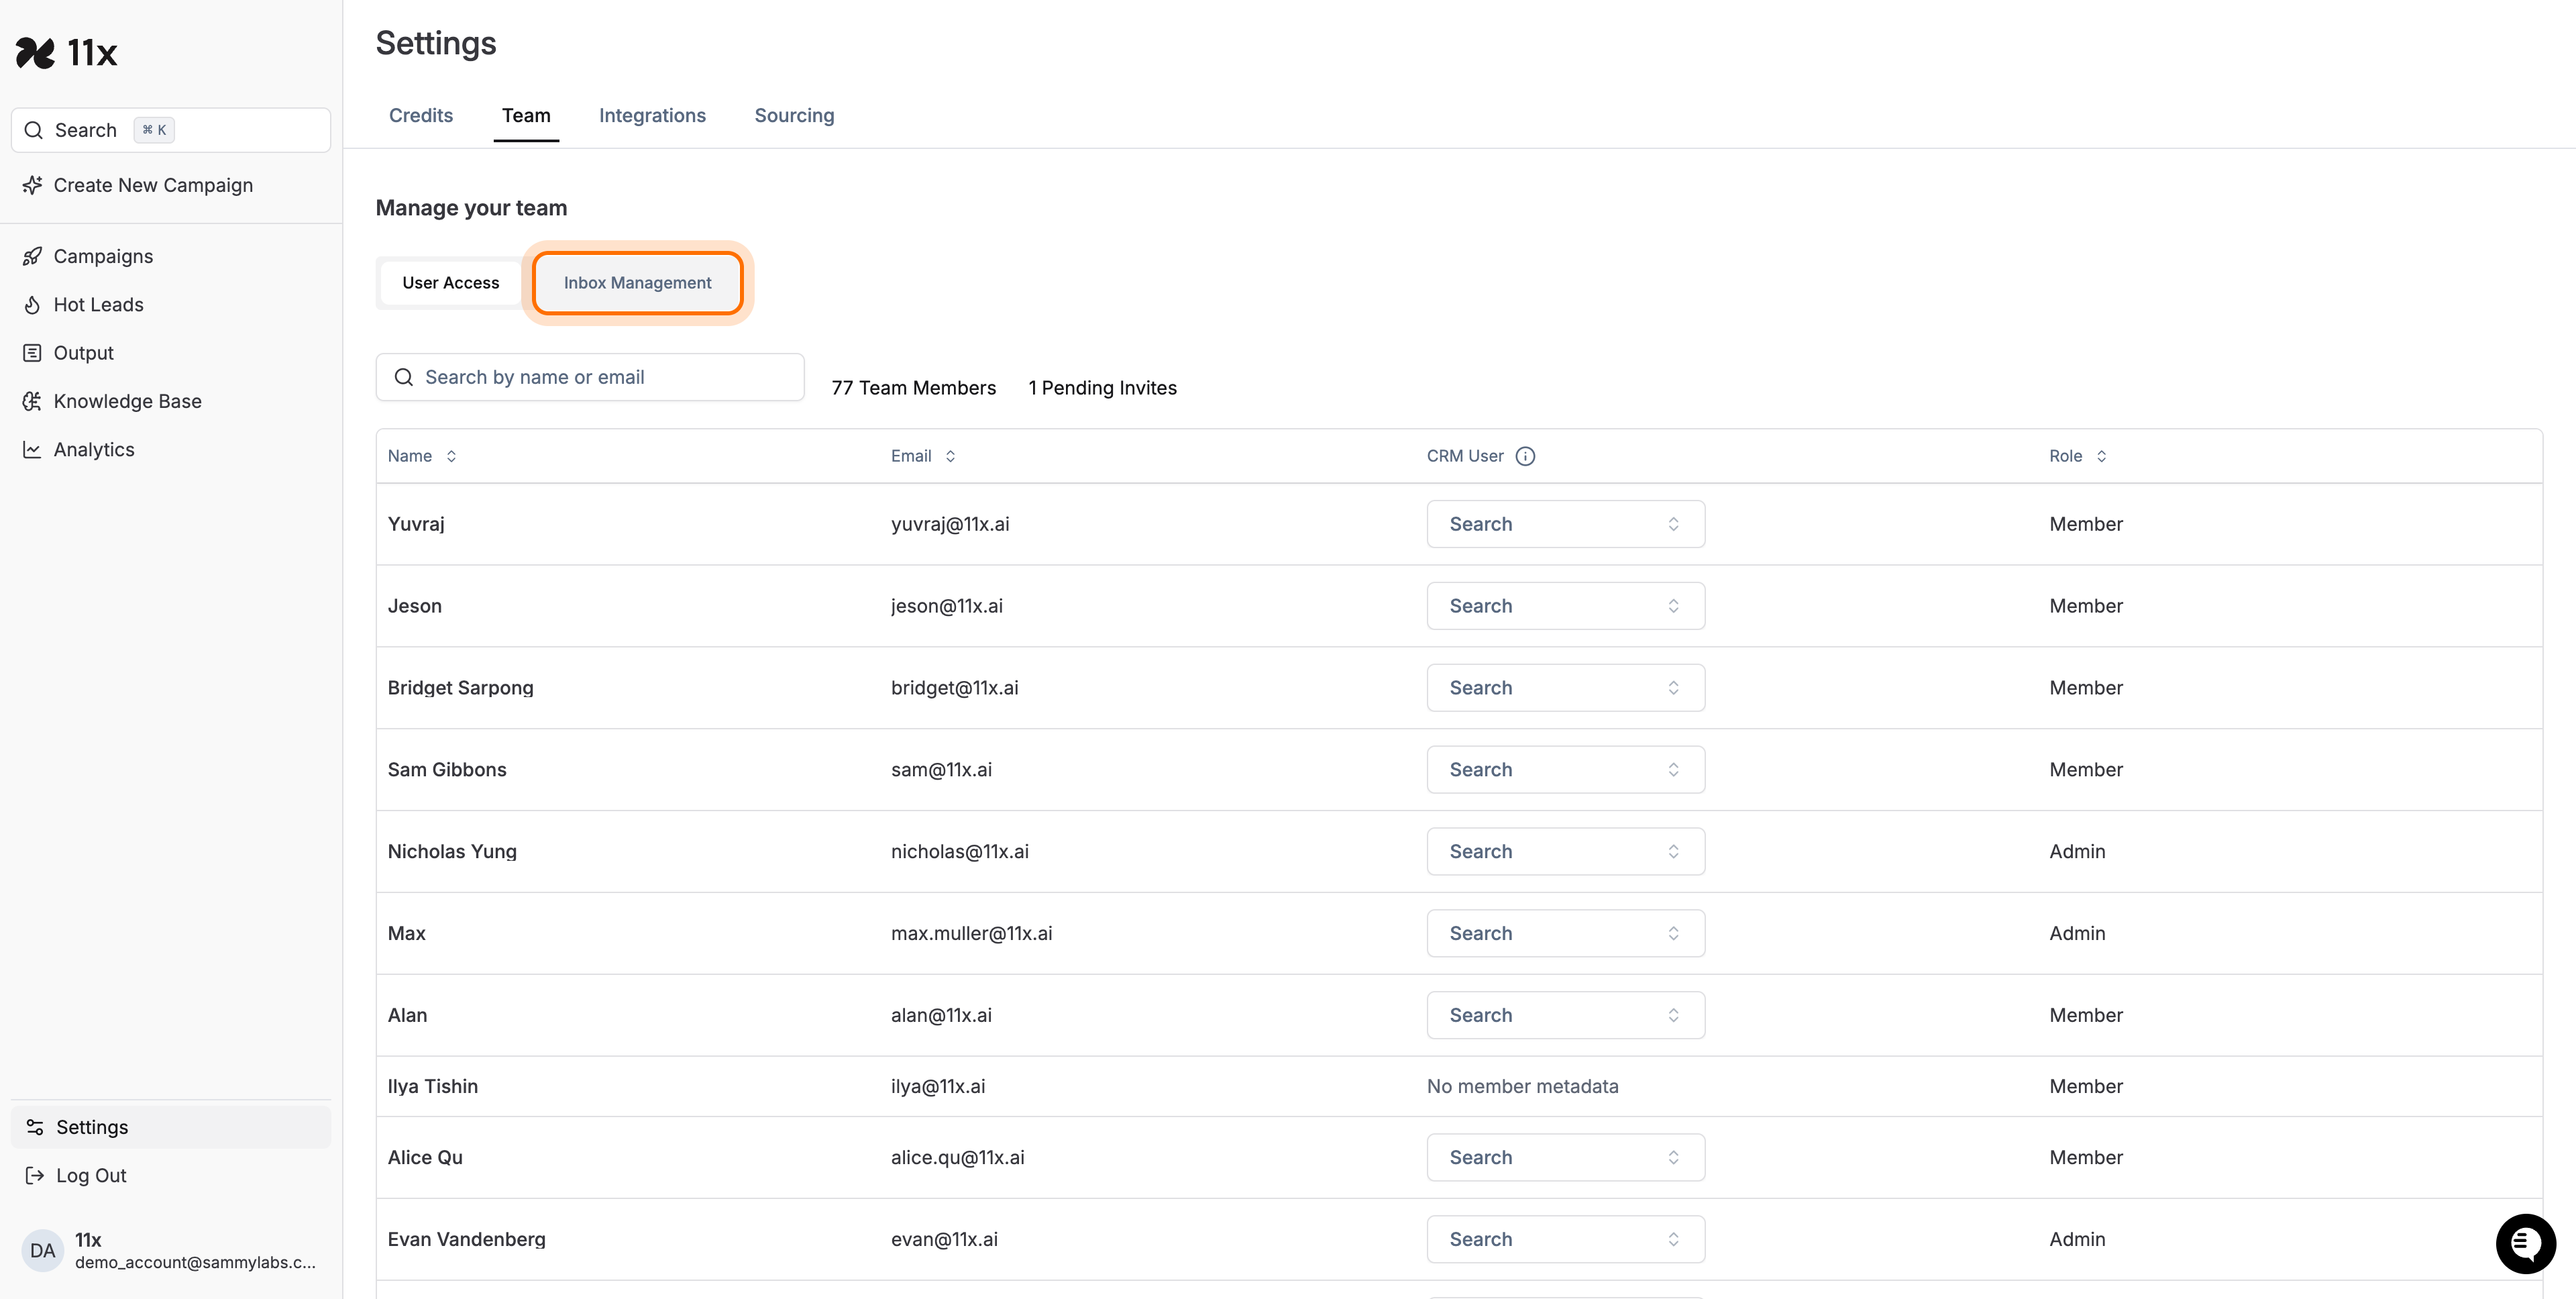
Expected outcome: the Inbox Management table appears, listing every team member and their associated inboxes.
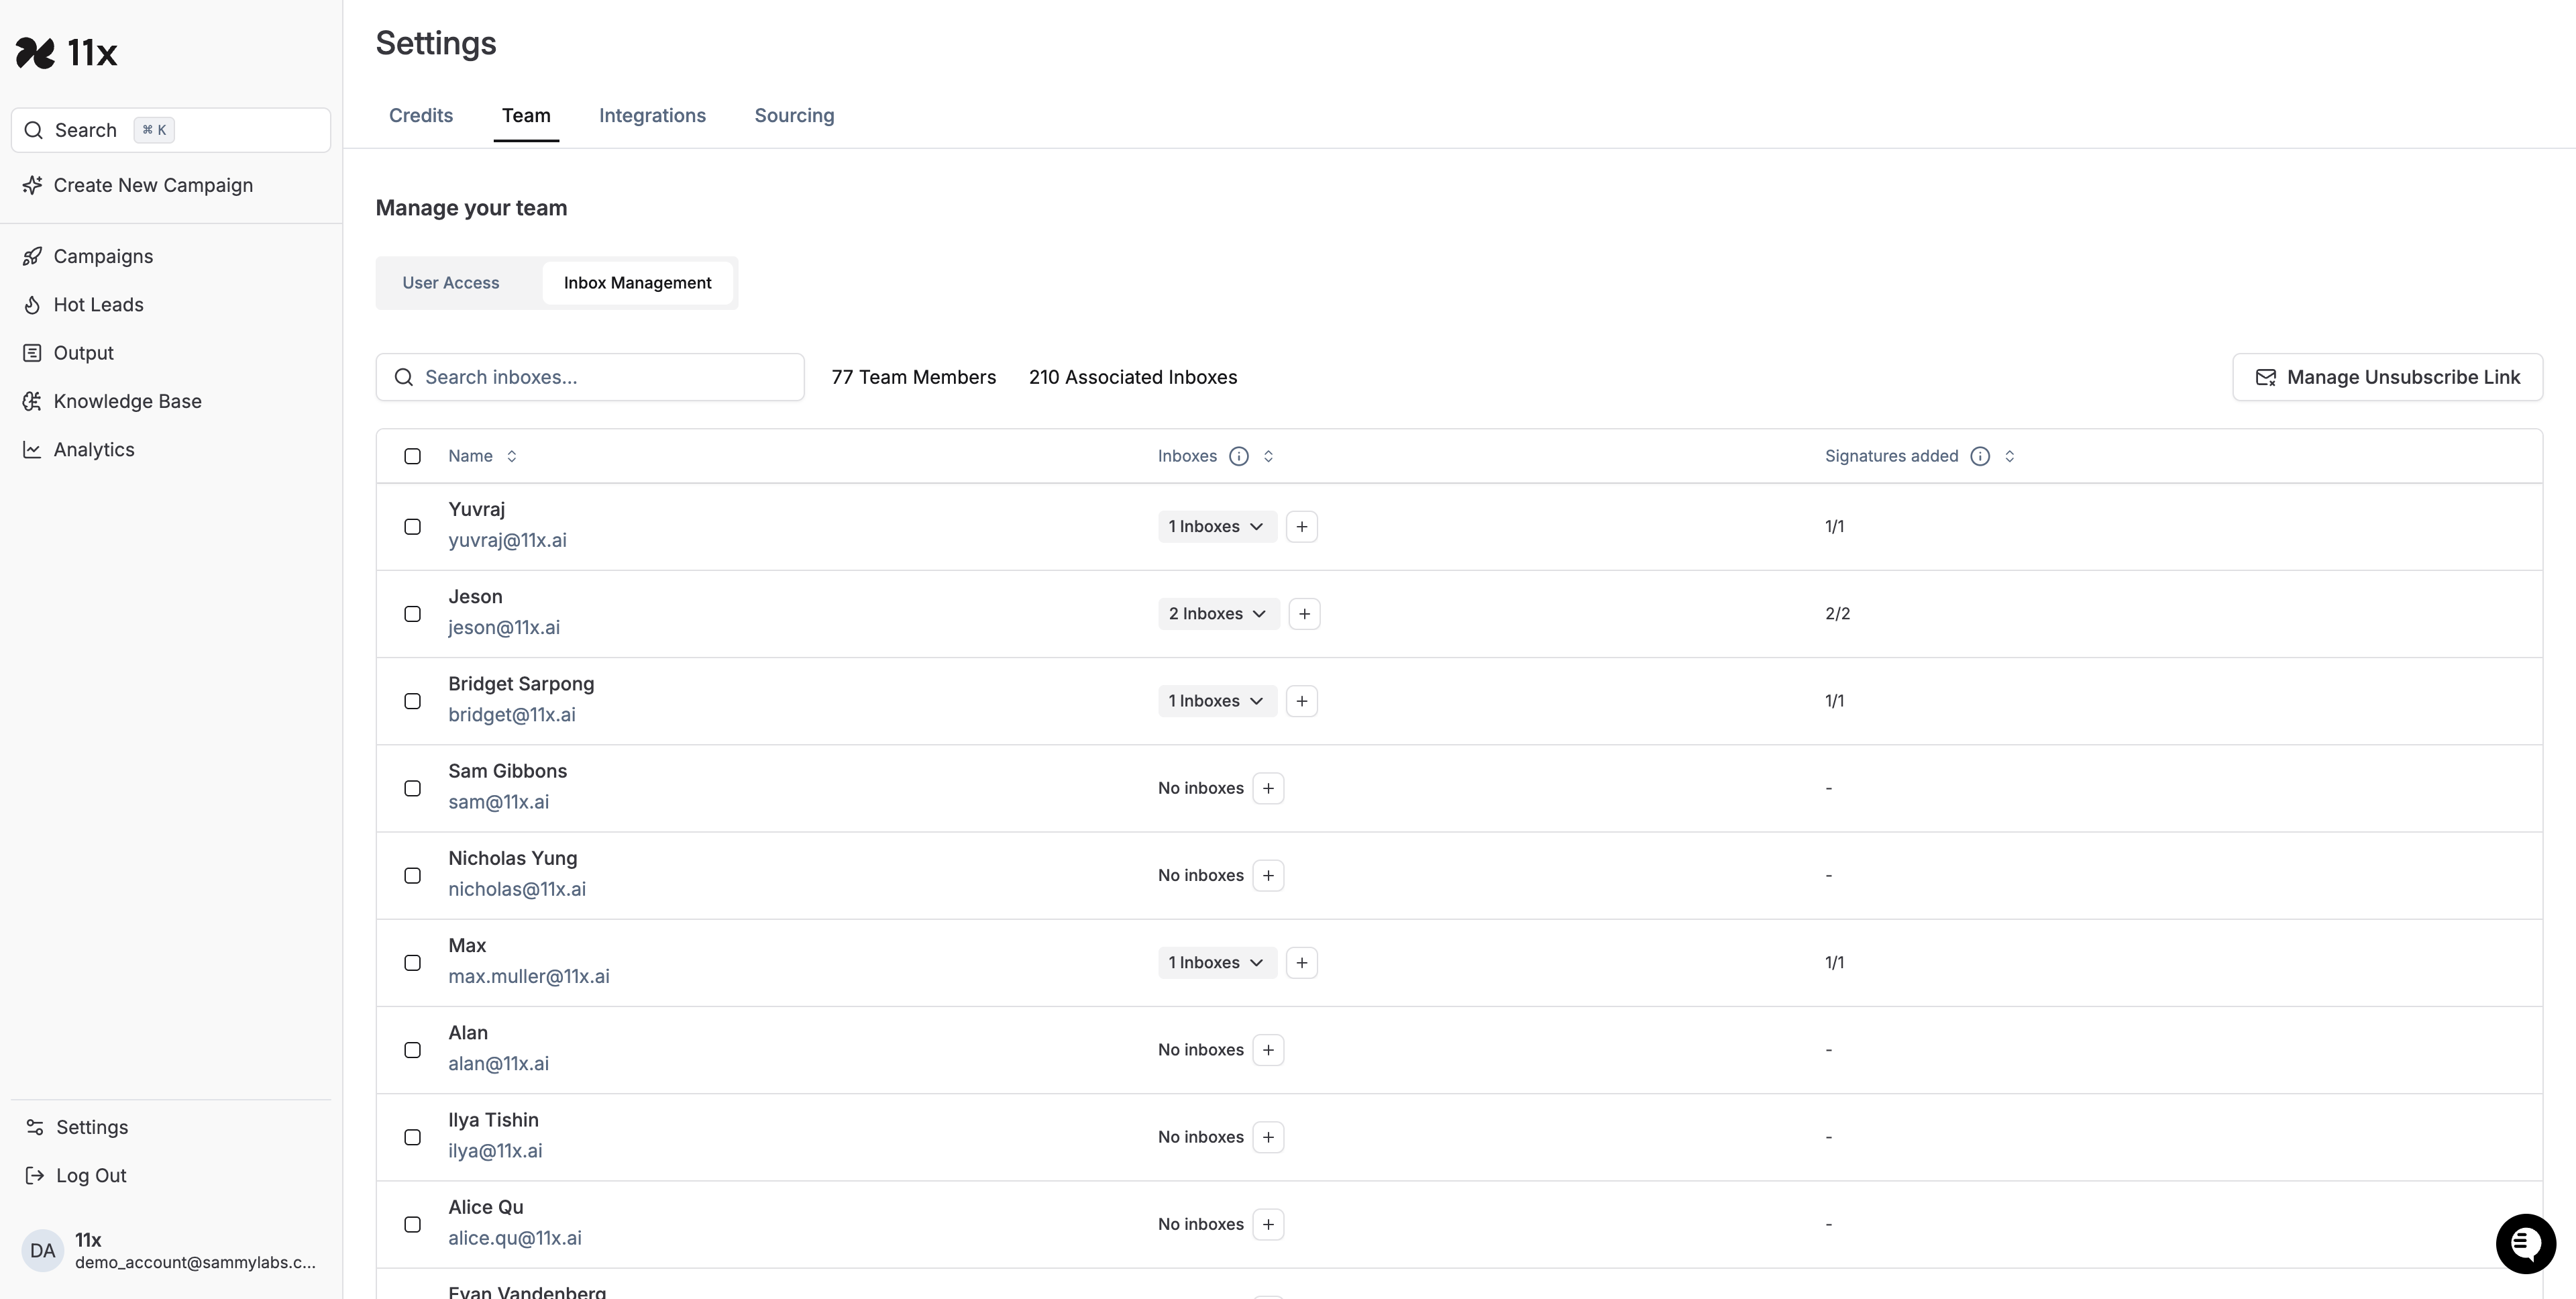
3. Review the Inbox Management Interface
Use this table to:
-
View each team member’s email(s)
-
See the number of associated inboxes
-
Check signature status
-
Perform bulk actions with the row check-boxes
-
Search inboxes / members
-
Click Manage Unsubscribe Link to configure organisation-wide unsubscribe text
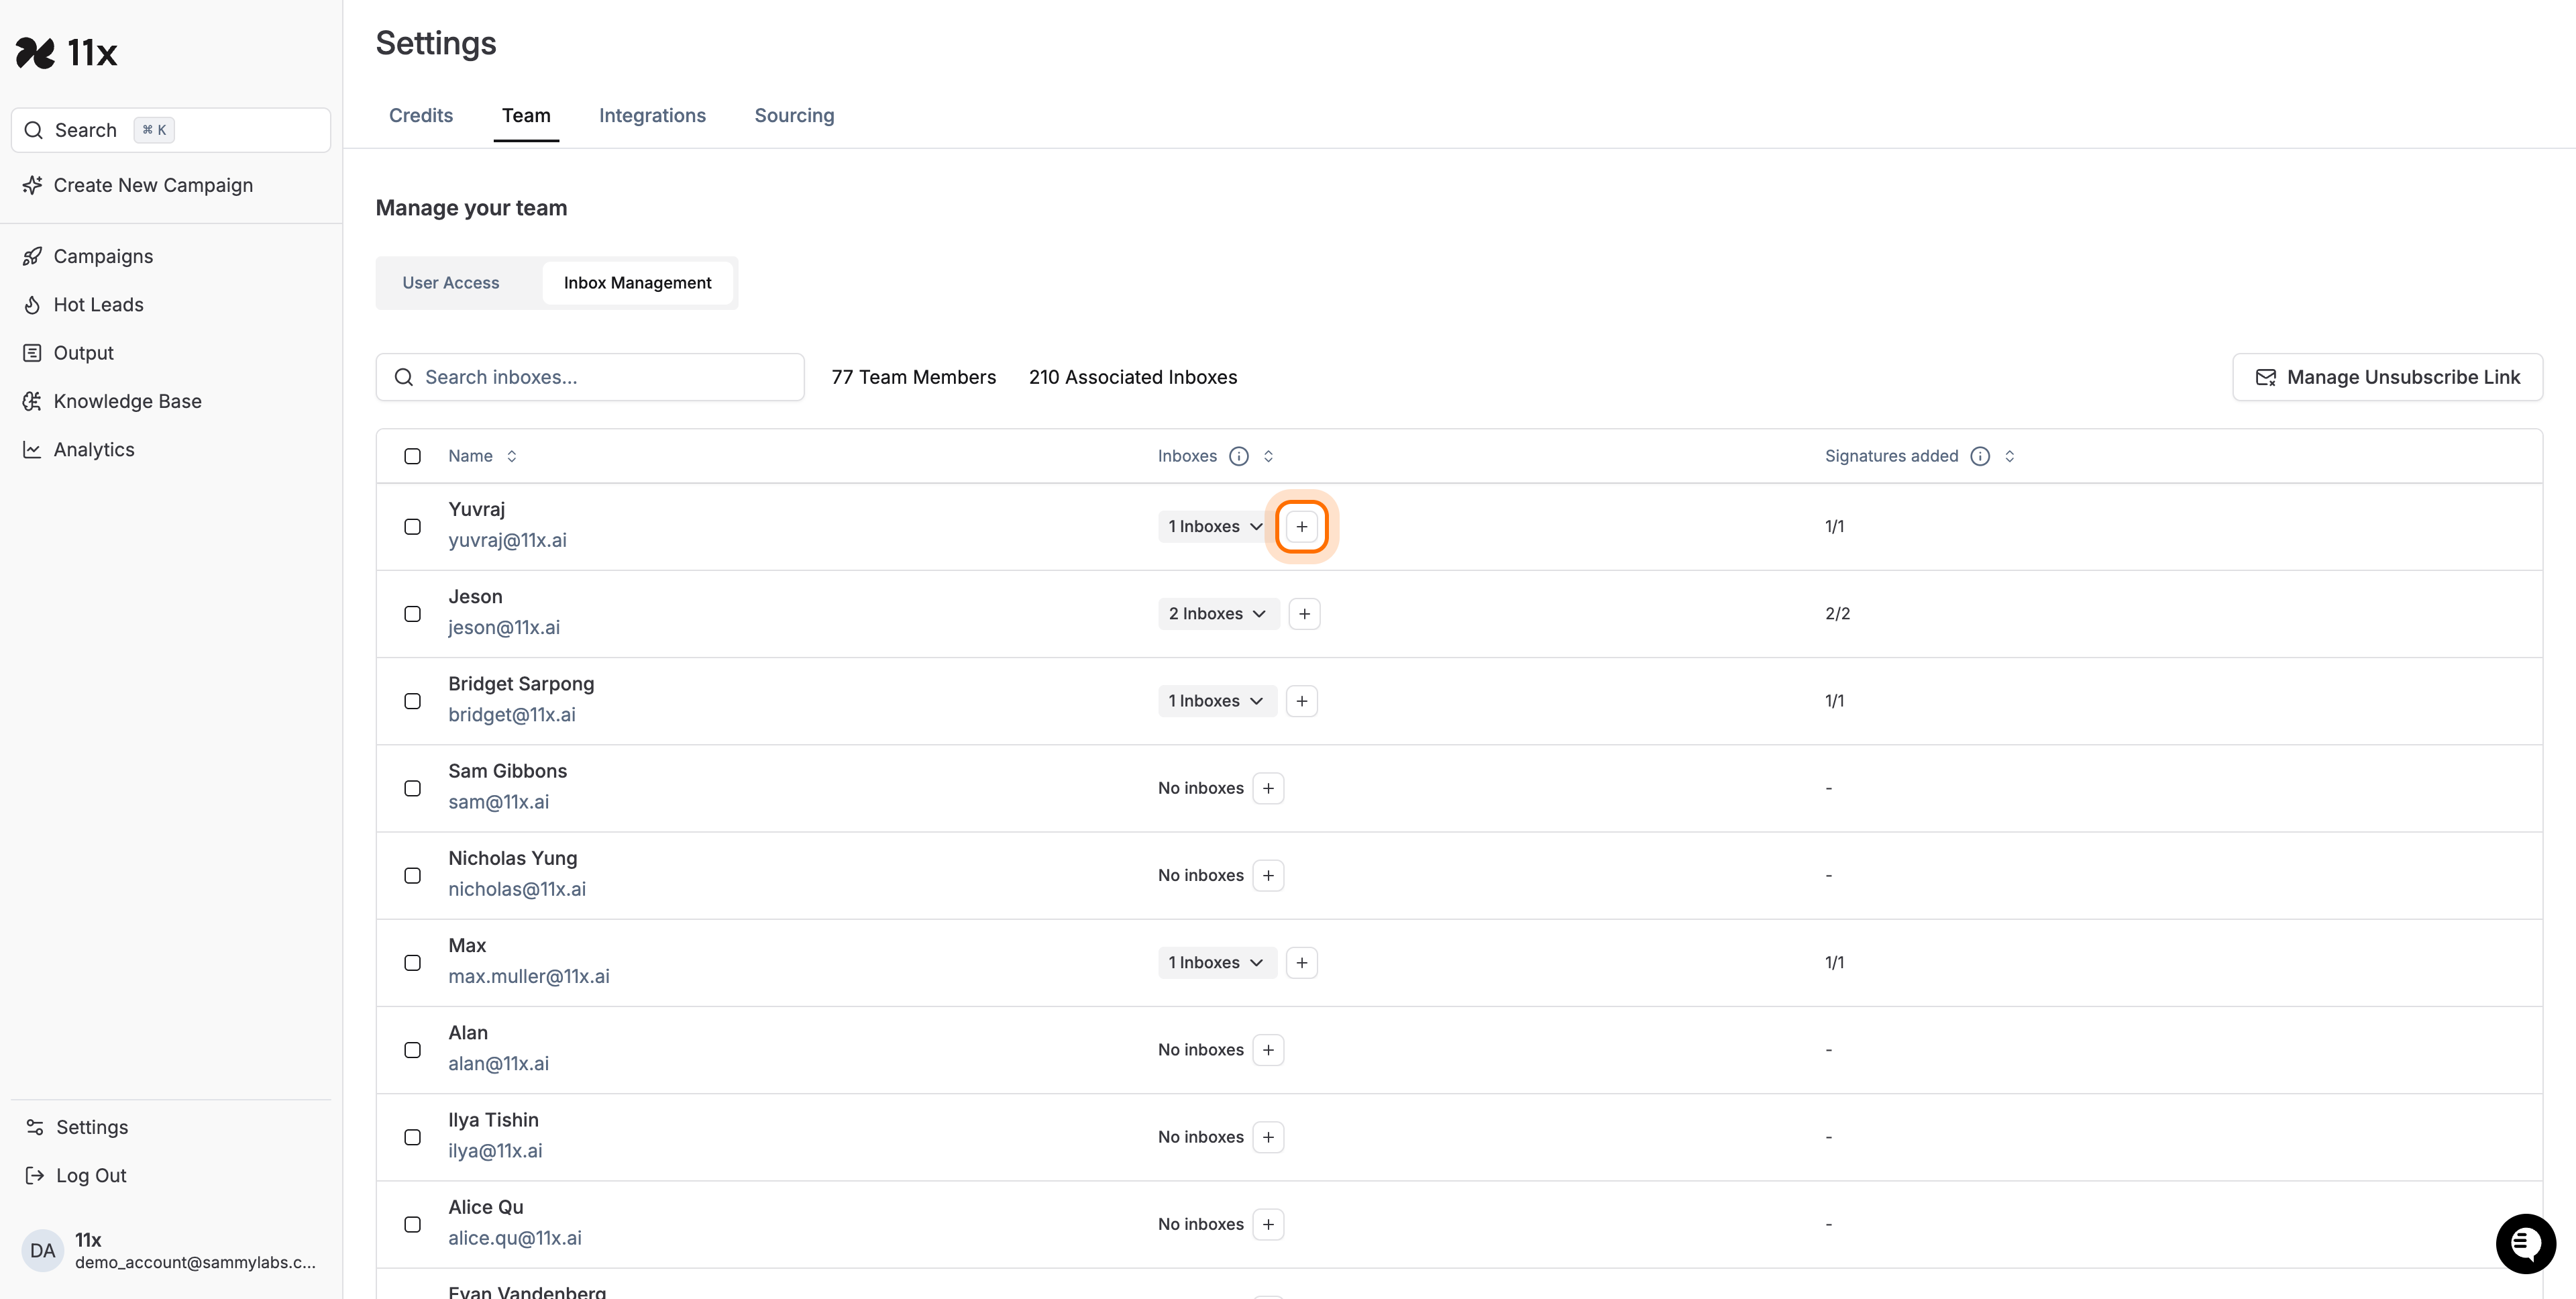
4. Associate or Edit an Email Account
-
In the table, locate the user whose inbox you want to update.
-
Click the + icon in the Inboxes column.
-
In the Associate Email Account modal, search or scroll to find the external account you wish to add and click it.

-
The account status changes to Associated. If prompted, follow on-screen OAuth or credential steps to finish authenticating the inbox.
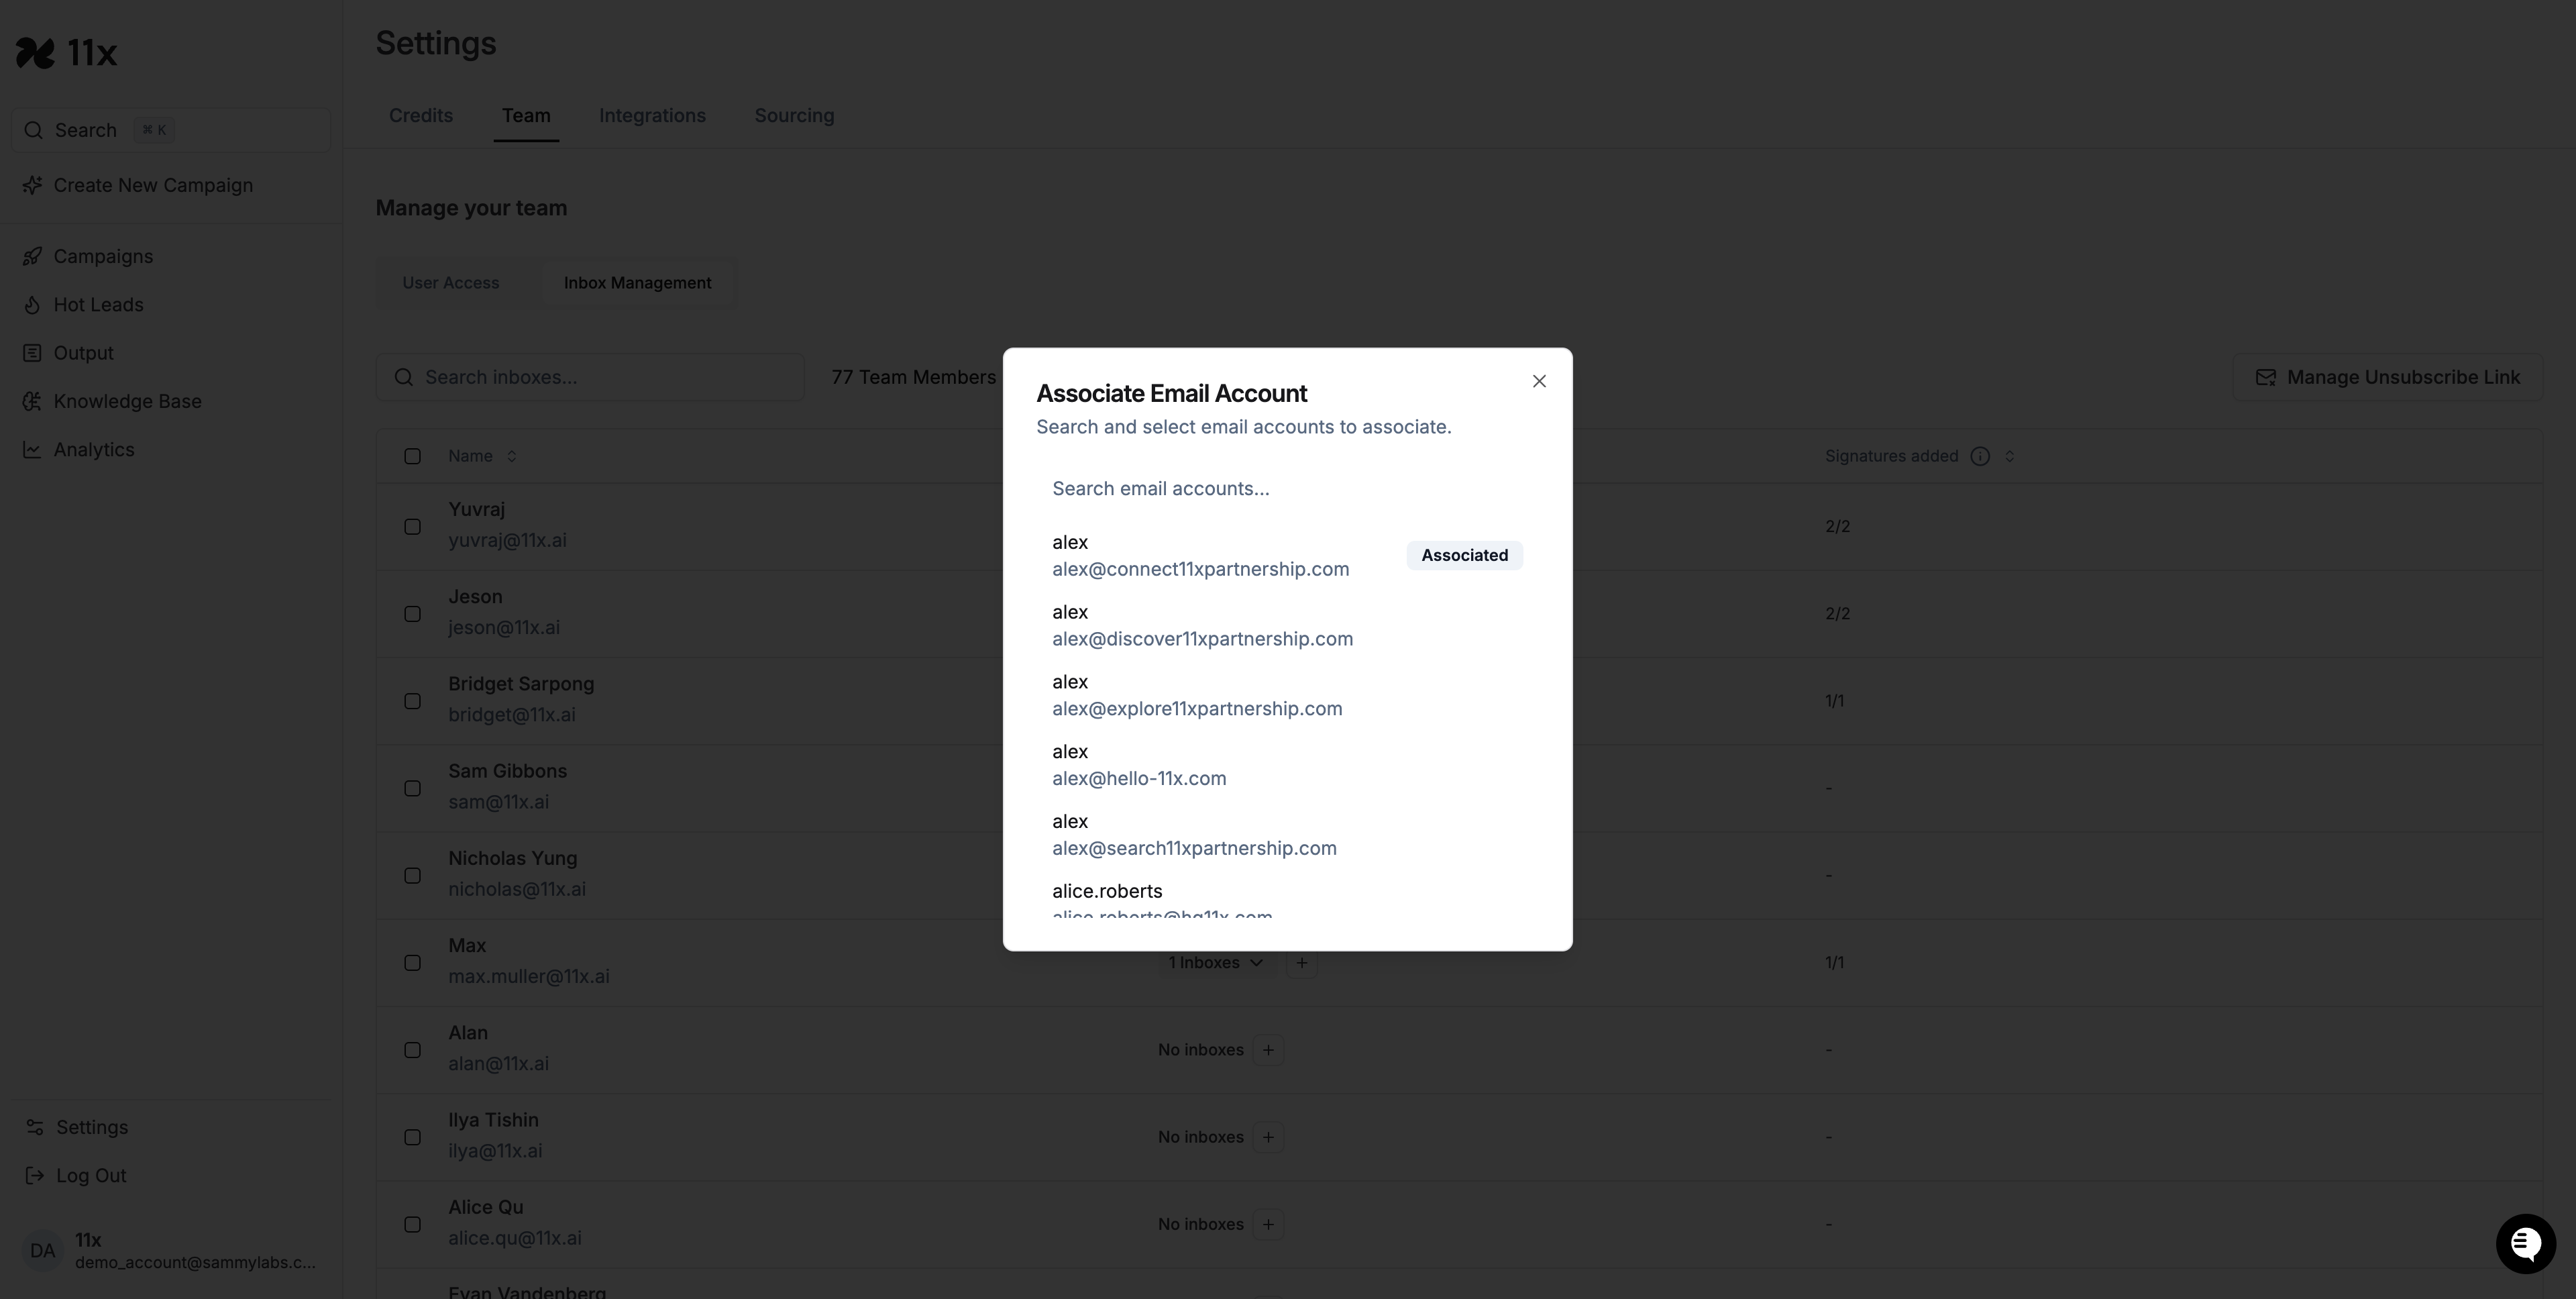
-
Close the modal. The newly-added inbox now appears in the user’s row.
Success criteria:
-
The inbox count updates
-
(If required) authentication completes without errors
Additional Features & Tips
-
CRM Integration: Use the CRM User drop-down in each row to link a mailbox to a CRM profile.
-
Bulk Actions: Select multiple rows to remove inboxes, resend signature requests, etc.
-
Search: Use the search bar above the table or inside the association modal to locate specific items quickly.
-
Manage Unsubscribe Link: Configure a single, compliant unsubscribe link for every outbound email.
-
Signatures: The “Signatures added” column helps you track whose signatures are still missing.
Troubleshooting
|||
Next Steps
After associating an inbox you can:
-
Configure forwarding rules or signatures inside each inbox (click the chevron > to expand a user row).
-
Map the inbox to sequences or campaigns as required.
-
Use Expand All for a bird’s-eye view when performing audits.